Pages

Showing posts with label Club Day. Show all posts

Wednesday, 16 November 2016

ALEPH vs ALEPH [Nimbus Zone]

So, another week, another BatRep. This time I played against James with his Steel Phalanx ALEPH list. (Last week was against Garth, and went so badly I'd rather not talk about it). This time we played Nimbus Zone, in preparation for the upcoming tourney. The key objectives are to disable antennas, steal data, and control consoles at the end of the game.

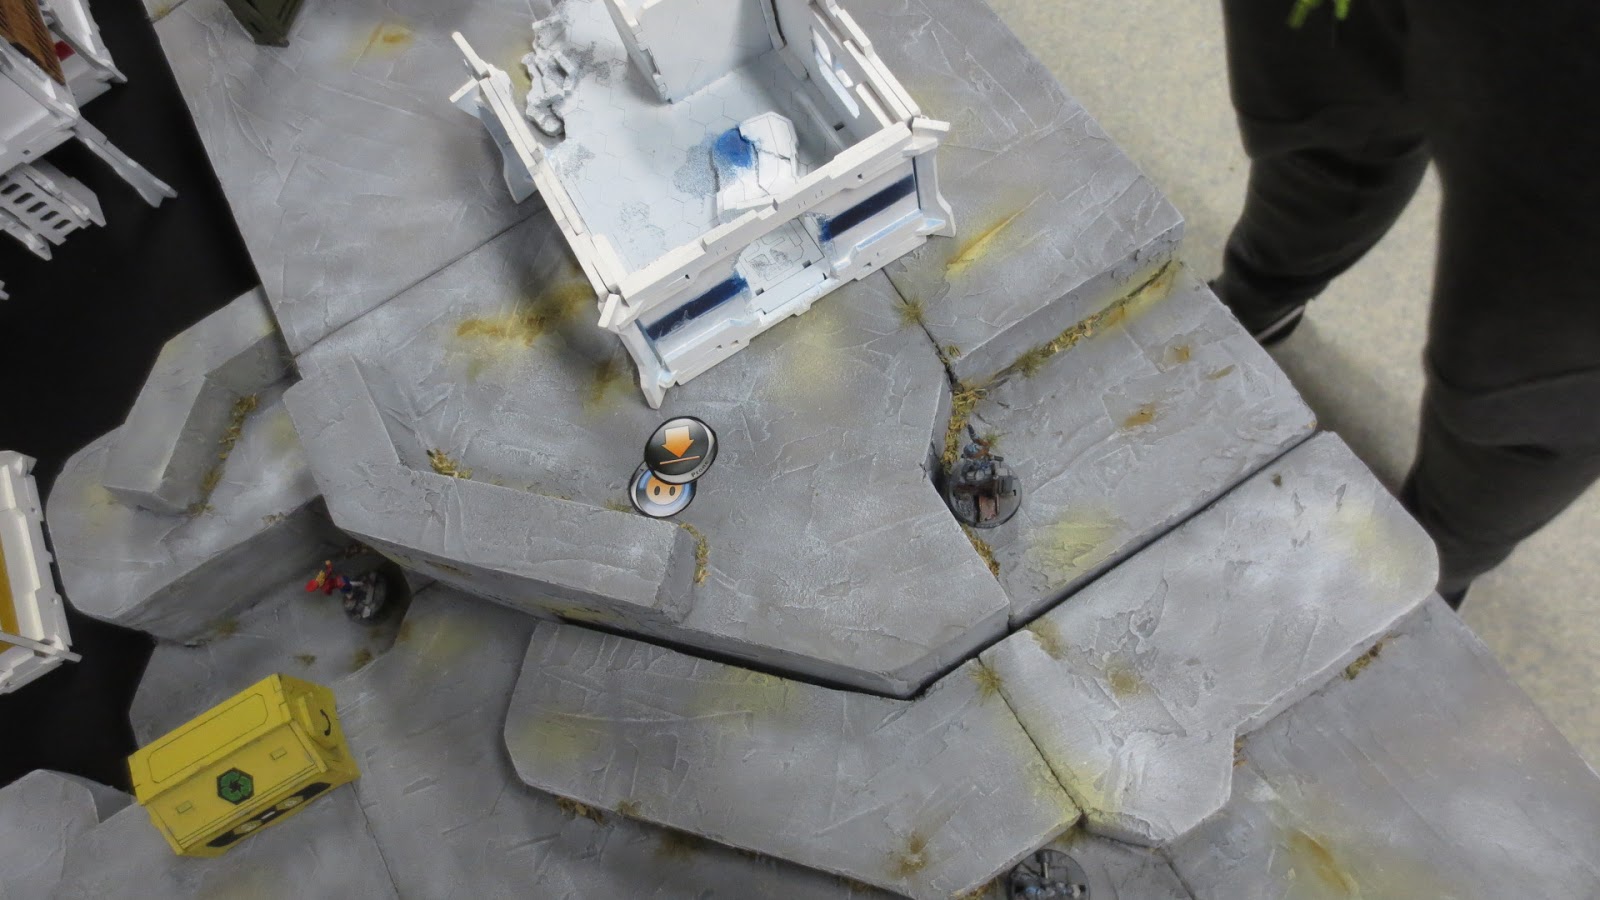
 So this is a quick shot of the table I played Garth on last week. It's also roughly the state the table was in by the end of turn 2, by which I'd lost all but one model, and Garth had swept all the objectives.

…the dice just hated me.
Anyway, onto this week, and back to my terrain collection. James set it up, and decided we would play crosswise instead of lengthwise, an interesting choice. He chose to take initiative, so I chose to take the western DZ, and have him set up first.

Army lists will be at the end of the BatRep, as usual.
 A shot of the table from my DZ, as James finishes setting up. He's got an Agema missile launcher on one rooftop, which is somewhat worrying, and another Agema covering the ruins and the forest on my right flank. He also has a TR bot behind the garage on the left, and Achilles, who can pretty much go anywhere with 6-4 move.
My deployment is actually quite conservative, with the Asura and Myrmidon officer backing each other up in the centre, the TR Bot and Agema forming an Evil Reaction Duo[TM], and one Netrod landing safe behind the main building, and the other scattering to land next to it.
 James states by moving Achilles up, quite boldly, into the face of the TR bot and the missile Agema. One lucky dodge later and he decides maybe facing those two alone, at long range, is not the best use of Achilles prodigious CC skills.
Next, the Enomotarchos link moves up, successfully disabling the first Nimbus Antenna. The Chain Rifle Myrmidon breaks from the link to cover the antenna and the console.
 The Enomotarchos link continues moving, the officer risking a shot from my officer's Boarding Shotgun.

The shot misses.
With his last order, James moves the Enomotarchos link up to claim the objective in his next turn.
 I start by using the Proxy mk 5 to disable the first Antenna on my side of the table, then move up towards the data console (which won't activate until round 2).
The EVO bot uploads Assisted Fire to the TR bot, allowing it to ignore cover while shooting. This will prove crucial later.


 The Proxy mk 2 attempts to take down the second to last antenna. She fails. Twice. On WIP 18! Third time, and second to last order, she finally manages it.
With my last order, I decide fuck it, I'm gonna try something different, and throw an E/M grenade over the wall with my Proxy mk 5.
 It hits, quite well, in fact. The Myrmidon Hacker, and Eudoros, both fail their dodge, and their BTS rolls. Now they've been crippled as order generators and active/assault pieces.

This would wind up being the move that essentially won me the game. It broke the Enomotarchos link by Isolating the link leader, and due to the specialist (hacker) also being Isolated, she was down to a single order each turn, and was well away from any other objectives.
So, after taking down the final antenna with the isolated hacker (which is fully legal, as she wasn't HI, and thus not immobilized by the E/M hit), James decides to take the offensive and hunt my specialists.


…with the chain rifle Myrmidon.
 Who tries his hand at pistol marksmanship against a long range TO Camo target (my Proxy mk 2). He misses, and she misses her return shot.

The Agema missile launcher, however, blasts him into itty-bitty pieces.
Now, seeing my Agema as a significant threat, James responds in kind with his Agema. Unfortunately for him, my Agema decides to roll a crit.

Unfortunately for me, James's Agema passes both additional armour saves, meaning he's only unconscious, not dead.
James moves his TR bot out from behind the garage, into LoF of my TR bot. We both have same the target numbers. The same advantages (and his cover is cancelled by my Assisted Fire program).

Two TR bots enter, one TR bot leaves.

…James rolled well, but just slightly low. I rolled slightly better, scrapping his bot. The problem was it was a fair fight, and he couldn't stack advantages against me.
 Next, Eudoros uses his order to take a shot, but my Myrmidon officer is faster with the smoke.

This then gives his officer a clean run up to my DZ. Now things are looking a little hairy.
His officer manages to duck past the TR bot's LoF, and shotguns my officer and Asura. The officer dodges successfully, the Asura does not (change facing roll, as LoF was obstructed by my officer, who uses her dodge to drop pron to prevent that happening again.

But that was his last order, and now that officer is swinging in the wind.


 My Dasyu reveals herself, taking potshots at the officer and failing miserably.

The Asura shoots, wounding only once, but taking a Nanopulser blast in return, which also wounds my officer and the helper bot next to them.


Ignoring the officer as a losing game for now, I go back for objectives, taking the first data pack from the left hand console with my Proxy mk 5.

On the right flank (which I did not get pictures of …oops) my Proxy mk 2 Carbonited Achilles, stole the data from the right hand console, and then wailed on Achilles with AP rounds from her shotgun, wounding him twice.
 Back to James, and his first action is to try his hand with Eudoros taking out my officer. Instead, we both crit, cancelling the attack. It appears as thought Eudoros sniped the grenade out of mid-air.
Now James pushes forward with Achilles on the right flank, firing his MULTI-rifle against my Proxy mk 2. She responds with her Nanopulser. Both models are knocked out of the fight.
 In a last ditch effort to screw with my plans, James's officer fires his nanopulser again, killing my officer, and wounding the Asura a second time. Through some miracle, the helper bot passes its saves.

The Asura's unopposed DA ammo shot finally kills the officer. There is something to be said for having MSV 3 and engaging at point blank/

My missile Agema runs across the rooftops and vaults a jeep to get a clear shot at Eudoros. He succeeds at taking down the legendary Myrmidon, clearing a path for my final push.


Said push comes courtesy of my slow moving—but still useful, and more surprisingly, still alive—EVO bot. Which runs, climbs the main building, and downloads the final data pack from the central console.


The final score was 6-0, in my favour. James, I feel, was let down by two key factors (aside from his terrible rolls). The first is that he didn't deploy his reactive pieces—the twin Agemas—where they could effectively cover each other, allowing me to pick off the only one truly threatening my position. The second factor is that he didn't as aggressively as he could have with Achilles, especially if he'd chosen to run through the middle and engage at short range, instead of trying to snipe from the flanks that my reaction pieces had covered.

I know I got very lucky with that E/M grenade, as it's never a reliable tactic. My Dasyu may also have been deployed poorly, though she had good sight lines from that rear corner, she never really used them—but that may also be because I didn't feel I needed to reveal her until quite late. Additionally, the firefight in the middle of my DZ with James's officer could have gone better if I'd given it a little more thought, perhaps dodging first, then using a fresh order to fire once everyone was safely split up.

All in all, however, this list works really well, and is only a slight variation on my favourite list from N2 (having only added the missile Agema in place of an FO Naga).

My List: OwBgjAPgzCIQggGQKIAUASACeATAbgIYB2AxgKY6YDyADmQE4EAuAlgPZEDOmAKgZwGtMAMTb1yEACwBSAKwAOGQCYQwWdICESsNIBs4adrDzNATjnzzK0+o1gZs08rCxN9uU8MuQmpUr0g/tpKMhrAFuEq8rbGHibaIOYakubA8pGm8v52Oo461uF2uh7FCVBu6o7qCTp2lTZeBgACLUA==

James's List:
OwBgTAPgzCIRYoFIBsAWMSzZEghNqmgIxZjECc+aqiWxAHDXjSneU/g7cPRSvkqoo3bMWYC2AVj7I8MtjQ695tJZVwABbUA=

Tuesday, 1 November 2016

ALEPH vs Haqqislam [Capture & Protect]

Club night last night for Infinity, and my vanilla ALEPH faced off against Heather's vanilla Haqqislam in preparation  for the upcoming tourney. Army list codes will be presented after the BatRep.

The mission was Capture and Protect, in which there are two beacons (flags), and two consoles. You have to hack a console before you can steal a beacon. Points are awarded for hacking the consoles, holding the enemy beacon, and having your own beacon safe. Bonus points for having the enemy beacon in your DZ, and for completing your random secondary objective.

This was out deployment, Haqq on the left, ALEPH on the right. Haqqislam won initiative, and elected to go first, so I set up somewhat defensively, leaving only my ARO troops exposed (snipers and missiles). I also infiltrated one specialist as close to my console as I could.
 This is one thing that may give me problems: Impersonation. Solution: Bait impersonator with 10 pt Proxy body. It's a specialist, but at that price—and with Post-Human's special rules—it's also very disposable.
First orders up, and Scarface advances to cover the console.
 Cordelia makes a run for the console, activates it, then runs and hides…
…somewhere I'm going to have great problems getting too.

I decide I'm simply going to ignore her.
 The impersonator crawls into the ruins on the high elevation section, oddly choosing not to attack. Then again, it's probably more expensive than my proxy.


With the last order in the pool, Scarface attacks the missile wielding Agema. The Agema misses, but—being a jammy git, and having cover bonuses—makes his saves.


 My first order sees my TO Camo specialist (Proxy Mk 2 hacker) leave the forest and dash for the console. The second order sees her fail the WIP roll to access the console (on WIP 15, no less). She gets it on the second try.
First order in group two sends a Lamedh repeater bot forward, firing a flash pulse at Tarik (not shown), and tanking a shot from a Zhayedan like a boss.
Group one orders see Scarface successfully hacked by the Mk 2 proxy (WIP 15 Assault hackers are nasty), and begin a run on the Haqq Beacon. [We would later find possessed troops can't take the Beacon, but that wouldn't have changed much in the end].


And with my last orders Possessed!Scarface drags the beacon into my half of the table as everything else sets up for ARO's if stops being possessed.


Heather used a Command Token to clear Scarface's possessed state, then brought on a spitfire Ragik on my left flank, starting to slice the pie on the corner of the building after killing a Netrod. This results in an Alert ARO by the Sophotect and her bot, allowing the Proxy mk 2 to turn around and face this new threat.


The Ragik puts all his shots into the Sophotect, who fails her dodge, but makes all but one save, so she's now in NWI.


Moving further around the corner the Ragik takes fire from the combi Dakini and the missile armed Agema. He fails the roll against the Agema, but mostly survives the missile impact, going Dogged.
Scarface then moves up to block LoS to the missile Agema who has been a constant thorn in the side of the Haqqislam forces.
 Scarface is promptly immobilised by the Proxy mk 2 using Carbonite, and suffers a crit from the combi armed Dakini.


The Spitfire Ragik wounds the Proxy mk 2, who elects to fail guts and roll behind some better cover.
 The Ragik the finishes off the Sophotect.
 Tarik, having done little this game except get flash pulsed, pops up and immediately crits my Proxy mk 2. On a 1. The irony…
 In my turn, the Naga with monomines lays out more of his mines, and makes a beeline for the beacon. Tarik fires, quite ineffectively as the Naga steals the beacon…
…dragging it back to my DZ.
And for my last orders, using group 2, the combi armed Dakini blasts Scarface at short range, then runs into CC to perform a Coup-de-Grace on the now unconscious TAG.


At the end of the day, on objective points, it's an overwhelming victory for ALEPH, ending 9-1 in my favour. We had a discussion after about what else could have been done, and whether or not an Alpha strike by the impersonator would have been effective against my force.

We also both had the same secondary objective (repair something with STR), but Heather failed because I killed Scarface before she could repair him, and I failed because my repeater bot was a freaking tank.

It was still a good game, and a learning experience for the mission and certain faction rules. Also a good demonstration of why repeater bots are so damn good if you've got WIP 15 hackers.


ALEPH Army: OwBgjAPgzCIQggGQKIAUASACeATAbgIYB2AxgKY6YDyADmQE4EAuAlgPZEDOmAkkUwxwsSrDpgBibeuQgAWAKQBWABwKATAE5gUeQEI1a+QDYQhtWDULdRpcptqQwDXpsr7IZSD3OVzhxsU9MAVFDXUwWCCQsPlzSN0wZSUNJLjnXVlnYGVgWJTDBMDQwLiwIKKA2IiygAFDFTMNIxsE2zKHRVyEnVCdf3SwHo0+kA0BipLq+RqaoA==
Haqq Army (This is best guess, didn't get a copy of the list):
CwBgjAPgzCIdBSGUFhAdgGwIIRgExIGoGE74CsSlJFKO6SGqIAnK7mE12pmWBygCSQ3FRhU0ADmBiuUqFOqYOOKIyjqSrEAgACBoA===

Weekly? Progress #5

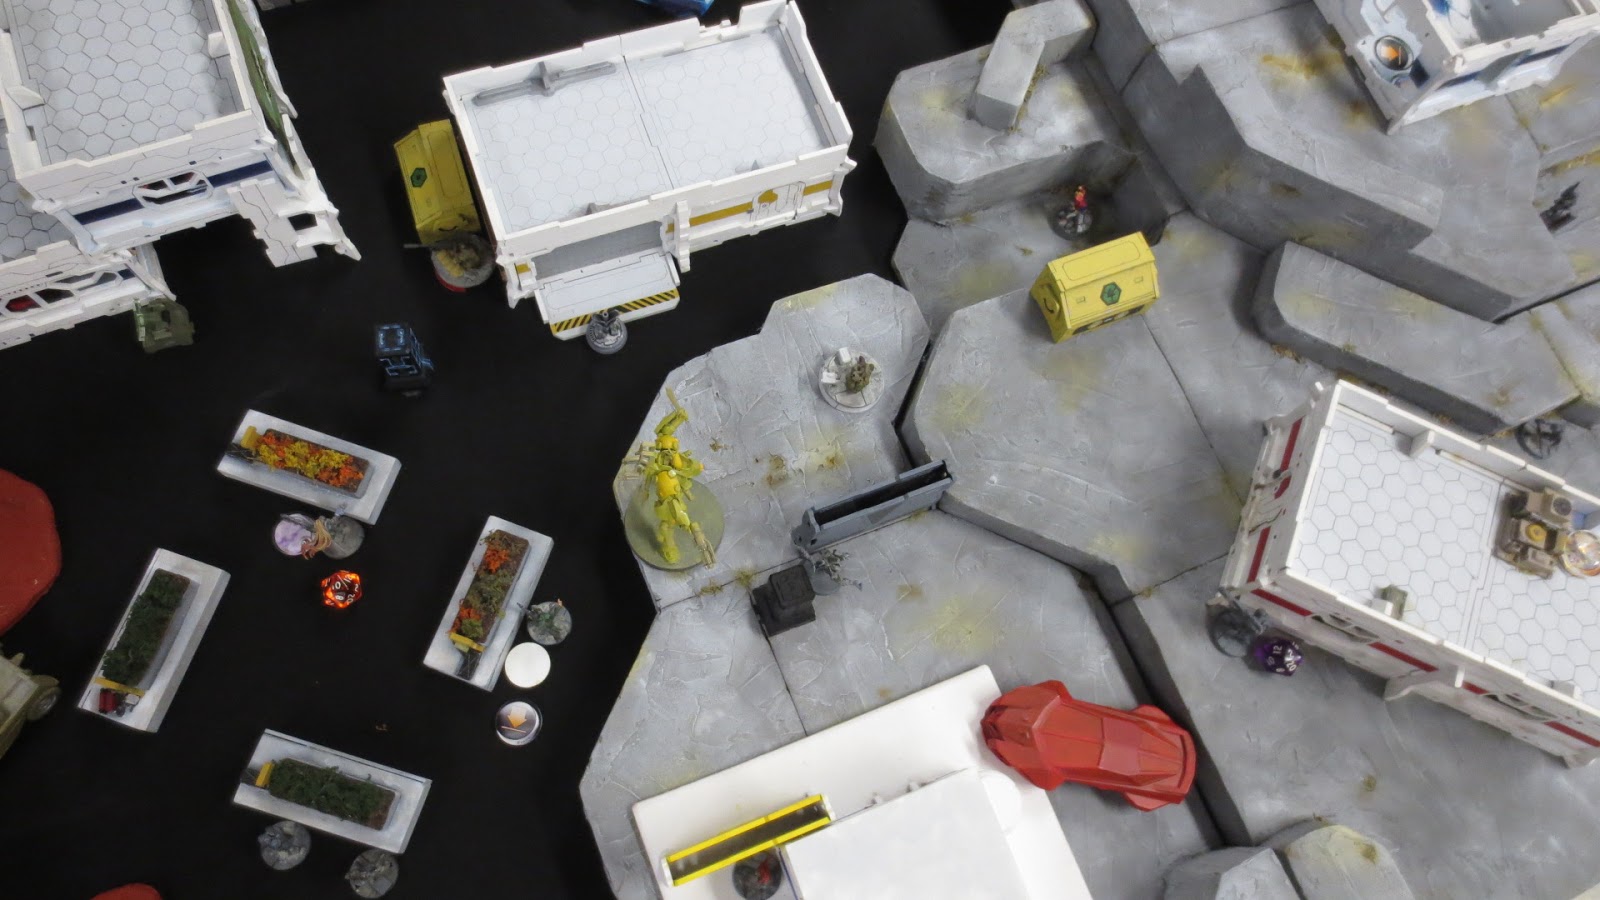
Heh, yeah, once again proving that I'm okay at making progress on hobby projects but absolutely terrible at documenting them. Instead of close ups, here's a picture of a battlefield with most of progress on it.

The elevations are all done now. The buildings that are 'based' are showing some progress—mostly the square one—and my trees now have forest bases to sit on during games.

I've also made some painting progress on more models for the army, but that'll be in a later update.

Saturday, 8 February 2014

A right Phonging

So, maybe it wasn't quite that one sided. In fact, it was very close, coming down to a single point. It was a nail-biting finish (literally) for Kevin, whose scotsmen I was facing. Scotsmen, with two dirty great blocks of 12 bases of impact foot, who, it must be said, swept all before them.

As did the actual Spartans, for that matter. Anyway, on with the pictures.

 So, the battlefield. Somehow, much to Kevin's dismay, practically all of the terrain winds up in my half of the table. Inconvenient places in my half of the table.

But I'd rather take than let his medium foot take advantage of it at this point. And Kevin has a lot of medium foot.
 And that's the armies. The plan was basically to break his centre and hope my flank could hold against that dirty great mob of Galwegians. It went horribly wrong, and horribly right somehow.
 Kevin has first turn. His entire army, barring the light horse (who seem to not like the look of the actual cavalry placed against them) advances with double moves, full speed ahead.
 My response is to close the gap. A fast game's a good game, right?
Anyway, right flank moves up. Cavalry falls into column in order to slip past the Galwegians. We will learn that in the end this is completely futile.


 So, the phonging begins here. Impact Foot against my Perioikoi. Superior Impact Foot. With a general. Hmph, just like Romans.

And just like Romans they manage to Disrupt my unit on the charge. And kill a base.


And thus the phonging continues. Galwegians are impact foot too. Against my poor, unsuspecting Thracians. Again, somebody dies, and they fall to disrupted.
 The inevitable happens in the melee phase. Perioikoi lose another base and Frag.
And the same thing happens to the Thracians. I can tell in short order Kevin's going to have taken 4 points off my army.


 So, we counterattack. Everything attempts to get stuck in.
 Although Kevin's light horse aren't too keen on getting stuck into by pointy sticks.
First impact, the "Iron" Perioikoi unit manages to disrupt and kill a base in the first scotch unit.


 So, interesting little situation here. The blackcloaks lose impact by 2 hits to 1, falling to disrupted. The goldcloaks win, with 6 hits to 2.

So Kevin fails the cohesion test (not unexpected), and a base automatically dies due to suffering 6 hits. Then he has to roll anything but a 1 to save.

…of course he rolled a 1.
 In the ensuing melee phase those scotsmen broke. (Doubling down, in fact). So now I'm on 2 to Kevin's soon to be 4.
 Then my Perioikoi broke.
 Then the Thracians broke. (And popped, due to being so damaged).

So, that's 4/9 points to Kevin.
 The blackcloaks decide being disrupted is no obstacle to victory, knocking another unit of scotsmen down to fragged. And they kill someone too boot.


And the "Iron" Perioikoi follow suit, forcing their opponents down to fragged as well. It's actually a ridiculously even fight now. Well, sort of.

I now have 4/7 points from Kevin's army, and he's got 4/9 from mine.
And then these guys pursue, catch the fleeing scotch, kill their general, slaughter them to a man, and wind up stuck in the middle of nowhere.

Remember when I mentioned Gone Horribly Right?

Yeah, this is pretty much the definition of it. The goldcloak spartans simply steamrolled completely through and enemy unit, pursued a total of 9", and placed themselves wonderfully out of position.

 As normally happens in my batreps, things start to get a bit messy as I forget to take pictures and get involved with the climax of the game.

Here is where Kevin's last unit of scotsmen obligingly broke for the blackcloak spartans. The other unit broke before the might of the "Iron" perioikoi shortly afterwards.
 The Galwegians are getting scarily close to my javelinmen. And my camp. It's the round up of this that will net Kevin another 4 points, and push me dangerously close to breaking.

Kevin's already there, having lost 3 units to breaks, so I have 6/7 points from his army at this moment, and he still only has 4/9 from my army.
 Some drastic and frantic manoeuvering begins. By which I mean everything gets in the way of everything else.
Some manoeuvering by yours truly. The only thing that really matters is the iron perioikoi on the left flank.


 As we can see, The Galwegians hit the camp, having forced the javelinmen to flee the field. Despite this netting Kevin 4 more points (so he now has 8/9 points from my army), I find this hilarious in hindsight.

Why?

Because nobody spends less than 3 turns looting my camp. I don't know exactly why. Maybe its the stamina of the spartan woman hidden within the tent.
 Anyway, more ineffectual manoeuvering. This is FoG. If you are actually manoeuvering, then something has gone terribly, terribly wrong.
 The dirty great block of galwegians charges my spartan cav and phokian hoplites. They manage to kill a base of cav in the impact phase.

They do nothing against the Phokians, who, obligingly, do nothing back—except make some rude gestures.
The melee phase is the crunch point. Three hits against the cav, and if they fail the death roll, they auto-break.

So, for a change, they decide they want to live, but run away, falling to disrupted before breaking off. (that skull was actually meant to be on the impact phase picture above.)


 So, impact phase. The "Iron" Perioikoi go for gold, slamming into the impact in the field there. They manage to disrupt them.

Here we see them locked in epic battle. Well, sort of. With a little luck (and an amazingly bad roll on Kevin's part), the scotsmen drop to fragged.

That's now 7/7 points taken from Kevin's army. But, he could still claim a draw if he can frag my Phokian hoplites.


My Phokian hoplites who are having none of that nonsense, despite being outnumbered nearly 2:1, they hold fast. The melee phase is over, and the final score stands at Sparta 7/7, Scotland 8/9.

A win, by a single point. But a win is a win in FoG. It was a damn close battle though, and that's the kind I love.

There is a second battle to go up later, against Glenn's seleucids… and while in the end it was close, it started very, very badly for me.

Stay tuned for more.