Pages

Sunday, 17 August 2014

Out of place, out of time (USMC vs Japan, somewhere in Normandy…)

So let's start by getting one thing straight: I'm terrible at this blogging thing. Thank you and goodnight. No, wait—I have a BatRep for you first. Maybe I'll even remember to occasionally post y building/painting progress here too.

So, this was our battlefield. Nice open centre, good cover towards the edges. Sort of, anyway. Lots of buildings to run through as well, good for some missions, bad for others.

So, first mission playing against Rob, and his Imperial Japanese Army. #4 in the scenario list; Hold Until Relieved. Turns out the japs were holding something important, and my first USMC division had been tasked with getting it back.


Thus the game began, Rob having set up an MMG and a veteran infantry squad in the building adjacent to the objective. My Marines could deploy every infantry unit on the table, at least 18" from Rob's units and the objective. One time playing an infantry platoon is more fun.

No, I'm afraid you won't see much paint on my models. Rob, on the other hand, has put as all to shame with his speedpainted IJA.

Squads set up in a rough encirclement pattern around the objective, preparing to take the buildings nearby and fight room to room if need be. My twin MMGs were set up in forward positions on opposite flanks, while one brave (if ultimately foolhardy) USMC squad formed up behind some hedges to take potshots at emerging Japanese troopers.

This rather proved to be a mistake, as they were within 12" of the board edge, allowing Rob's troops to assault on the turn they entered. This was the second order of the game, the first being mine, placing an airstrike on Rob's MMG in the building, the only target my Forward Air Observer could see to vector in a strike.

The unfortunate Marines in the corner murdered four incoming Japs with reaction fire, and brought down another two in melee, but sadly, it wasn't enough to stop the fanatical Japanese troopers.

The next major event was my medium mortar getting a round off, managing a hit with the first shot—requiring a 6 to do so. What followed was a chain of luck so good it was almost painful. Because the mortar shell crashed through the roof, exploding in the midst of Rob's MMG team, all three members fell to the high explosive, removing the need for an airstrike. The mortar was to prove just as effective the next it actually managed to hit anything, several turns later.


A comedy of errors in sniper vs sniper warfare followed, my sniper hitting but failing to wound the Japanese marksman, the Jap sniper failing to hit at all (needing only a 2), and my MMG causing only 1 wound out of 4 hits. It was enough to remove the threat of that sniper for a couple of turns, which was a welcome change from what Will's sniper normally does.


The rest of the turn was all movement, squads entering buildings, and Rob bringing on the rest of his first wave. My airstrike turned up promptly, strafed the empty top floor of the building, and left.

The turn opened properly with Rob bringing on a couple of units, then I rallied my Marine squad in the south-central building from 4 pins. The First Lieutenant's +2 Morale bonus proved invaluable this game, helping pass six order tests at insane numbers.

The rest of the turn was once again rather uneventful from what I remember, mostly those troops that had fallen short last turn now entering the buildings to the lower left of the picture, while other pinned units rallied.

Rob managed to get most of his reserves on this turn as well, getting lucky with his reserve rolls, and even luckier with his light mortars in his grenadier squad, shelling my Marines in the north section of the long green-roofed building.

 Turn three opened with a storm of fire focused on the lower level of the central building, starting to build up pins on Rob's IJA veterans in there. If you really want to pin a unit, you have to throw the kitchen sink at it—so I did.

The bazooka, as usual, missed every shot, leaving the house with some nice new windows and open plan living arrangements while only mildly inconveniencing the Japs occupying it.
Next up was my surviving MMG team—the one on the western flank having been toasted by a sneaky flamer earlier this turn, said flamer promptly running out of fuel and running for the hills. The MMG on the eastern flank made up for the loss of its partner by plowing through a light howitzer that had the audacity to try shooting at it, killing one of the crew behind the gun shield.


For this, however, the MMG team paid the price, another IJA veteran squad entering the board in the northeast, spraying the team with small arms fire, cutting down two of them. The gunner, finger on the trigger, cares not for such trifles as dying because of bullets, and holds on for grim death.


 Sometime during the third turn my FAO, having repositioned in turn two, vectors in a second strike against Rob's IJA grenadiers, then takes heavy fire from the veterans in the objective building, losing his radioman to the fire, but remaining steady awaiting the sound of nearby aircraft engines.

Turn 4 opened with a bit of a strange move from Rob, placing his IJA vets in the open. So my squad of Marines advances from the building, putting up a murderous curtain of fire, killing five of the team, not quite enough to force a morale test.


 Following their compatriots lead, another Marine squad rushes from their building, pouring point-blank fire in through the windows of the building the other IJA vets are sheltering in. This causes no casualties, but puts down another pin marker on the vets.
The north team from that same building, having rallied last turn, also advances, opening up on the IJA that killed the gunners—the last man having been taken out by a kamikaze nutjob with an plunge mine on a stick. The depleted Marine squad, having suffered two turns of shelling from the grenadiers, take out their irritation on the IJA in spectacular fashion, killing half the squad.
Then, in the centre, I decide it's time for an objective run. Only two turns left, with the possibility of one more. Balls to the wall as everything advances on the IJA vets sheltering in that central building.

AT squad, with their tommy gun sergeant, they get some hits, but no casualties. Bazooka, predictably, fails to hit the broad side of a barn. Of course, there may be rather less barn at this point.


Then, in a fit of pique, I fire the mortar at the IJA vets…KABOOM! Straight through the building, falling through the large hole the MMG team left while busy exploding, the heavy round detonating amidst the veteran Japanese troopers, killing a terrifying six of them in one blow. Yes, yes, I think I'll keep this little monster.

Little else of real note happens, some maneuvering here and there, and pot shots all round, but the dust settles on turn 4, my airstrike having been delayed at the start… and leaving me hoping I didn't roll a 1—letting Rob take control of it—at the start of turn 5.

I rolled an amazing string of numbers for the airstrike, pinning down everything near the target, calling in a heavy ground attack aircraft (my SBD Dauntless here) that released its payload and obliterated the grenadier squad where they stood. When the dust settled there was only a large crater and small bits of tattered uniform lying around it.
Following that, my Marines assault Rob's final two IJA vets, and a after a brief, bloody, fight, emerged victorious, claiming the objective. Rob ceded the game at this point, realizing he had nothing that could reach the objective in time—and survive the onslaught of USMC fire long enough to hold it.

US Victory!

Monday, 28 April 2014

High Fantasy, Uruks laid low, Gobbos bashed and Dark Elves smashed.

Sunday was a good day. Three games in all. LotR against Mark in the morning, cooked up a 500 pt Gondor list to take on his Uruk Hai berserker horde. Mark played a good game, but forgot something crucial about his army: everyone gets two attacks. I'm not familiar enough with the LotR profiles to remember that stuff. So it turned what should have a been an uphill struggle into a fairly even match.

I just squeaked a win in the end, with Boromir slaying Mark's second troll. The first troll very nearly died from the first round of shooting in the entire game. So many 5's and 6's in a single roll I have not seen in a long time. Hilarious seeing a troll turn into a pincushion from just 5 bowmen.

Most of the battle revolved around the bridge over the river. By which I mean by guys got horribly slaughtered up there when the troll arrived. They did fairly well until then, with me and Mark losing roughly equal numbers of warriors. The troll did well until it tried facing Boromir, which led to a solid face-walloping with the Banner of Gondor.

Pincushion Troll. Part 1 of the highlight reel.
The bridge, mid-game. Berserkers vs Warriors of Gondor. Pretty even so far, but that troll is very close.
Later that day. Two trolls and a bridge. I'm running quite low on warriors.
Boromir, meet Troll. Troll, meet pointy-end of sword. 
Look ma, no trolls!
And that was that, end of the game. I had an untouched Boromir, three warriors, and a guard of the fountain court. Mark had 3 berserkers and a shaman.
Next up was a couple of games of Kings of War. We played with simultaneous turns, priority roll, move/move, shoot, fight. Much faster than even regular KoW games. They were brutal too. I also learned why Elohoi regiments clock in at over 300 pts. 18 attacks with Crushing Strength (2) that hit on a 3+ are deadly. Combine that with Flying, 10" move/20" charge, and Defense 6, it's nuts. Oh, and they also have regenerate. There were comments about "broken" angels.

Then again, I'm shelling out nearly 400 points, including upgrades. Nearly half my army at 1000 pts. It'd had better hit and soak damage like it costs 400 pts.

Anyway, first up was Mark's goblin horde. Also known as the "excuse me; how many units?" army.
For reference, that's 5 units of goblin sharp-sticks, 1 of bow armed gobbos, 3 mincers, 2 heroes, and a giant. 12 units all up. I have 5. 2 Paladin Regiments, Elohoi Regiment, Ur-Elohoi hero, Heavy Arbalest (war engine). They lack a little in the manpower department as I need to get some more models.

Turn 3 here, I think. Elohoi regiment has done some damage to a large unit of sharpsticks (ie: ripped them to tiny little pieces of gobbo), and both Paladin regiments are engaged. Giant does nasty things to one of them.
 Turn 5. Elohoi charged by Goblin characters. Giant charged by Ur-Elohoi. Arbalest charged by sharpsticks. Unsurprisingly it lost horribly. So did the goblin characters. And the giant (who already took quite a bit of damage from the Paladins earlier).
The aftermath of turn 6. Elohoi Regiment got charged in the flank. Split attacks 6 each way (gobbo character, gobbo hero, sharpstick regiment). Somehow managed to win everything despite being flank-charged. Rolled awesome for nerve tests, making everything run away.

The only goblin survivor is a very nervous looking shaman…


After that, played against Rob's Dark Elves (or Twilight Kin as Mantic calls them; semantics). He had a queen on a dark pegasus, knights, ogres, lower abyssals, warriors, spearmen and crossbowmen. Still much bigger than my list.

 Went my way pretty much from the get go, with the hiccup of losing an entire Paladin regiment to a stupidly good roll on Rob's charging knights.
This was the most epic combat, running around the middle here. Paladins in the rear of the ogres who were facing my Ur-Elohoi who got charged in the rear by the dark pegasus. Lots of hits everywhere (especially on the Ogres and Paladins). Hilarity ensues when both Paladins and Ogres get snake eyes for breaking their opponent's nerve.

The Elohoi regiment makes ridiculously short work of the crossbowmen regiment at the top there.
Final turn. The Elohoi regiment, virtually untouched, are the only ones left standing on the field of battle. Given that they hacked through a regiment of warriors, spearmen, and crossbowmen in consecutive turns, worth every point.


One thing we did find was that by making KoW simultaneous activation it messed up the meta for shooting. We're considering making the shooting phase first in order to combat that. Playtesting will see if that's right. We're also considering adding charge responses: Counter Charge, normal movement towards charging enemy. Evade, half move back. Stand and Shoot, make a shooting attack instead of making a melee attack.

Wednesday, 5 March 2014

Being Lazy

Really, that's about the only excuse I have for not doing more work on my hobby stuff. Too much playing video games and writing for my RP. Anyway, I did some stuff. With tools. And magnets. Oh, and some painting too.

 On the left, PHR Ares walker. PHR Phobos AA walker on the right. PHR Neptune Dropship to the rear.
On the left here, Traktor Mul (Uragan), and on the right a Zouave.

Sunday, 16 February 2014

A little bit completely smash-ed — BattleCry day 2

So, yeah. Not a single win today. But some very fun games, especially against Kevin's Scotsmen (who are now owed one right phonging) and Rob's vikings, who are now owed two beatings. Against Steve's shooty chariots the dice just hated me. I have never seen so many 2's and 3's for cohesion tests in my life. From shooting!

So, pictures
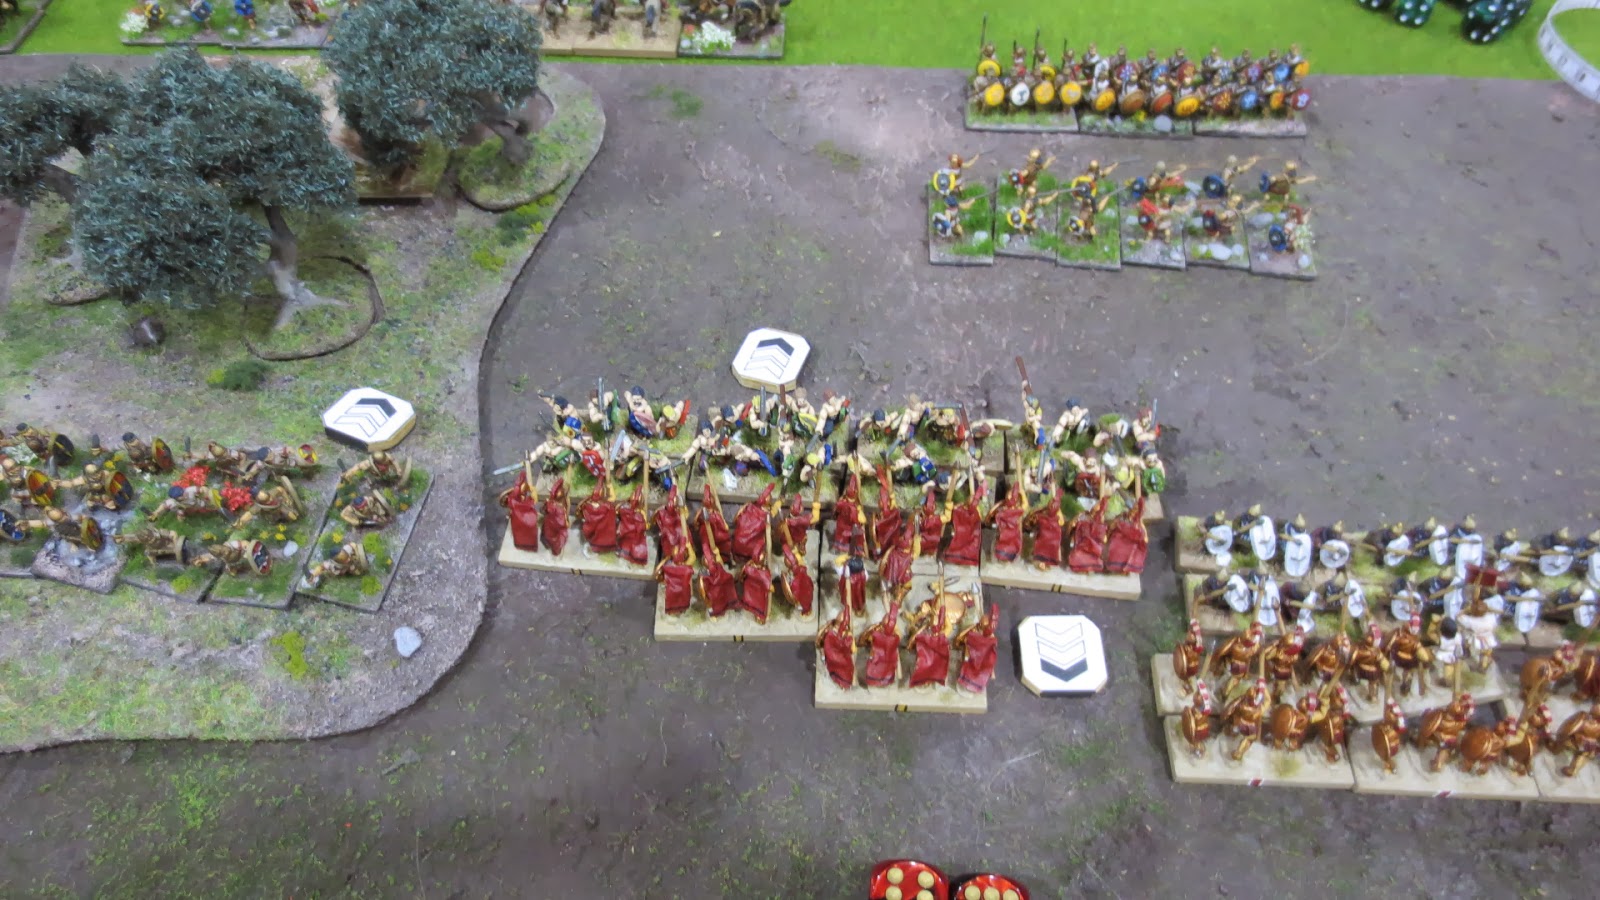
Kevin's scotsmen, set up against my Spartans. Just look at all that medium foot in the open. As you can probably guess from the intro, didn't go so well for me.

 This is after the first impact phase. In total, 40 hits were inflicted spread across 8 battlegroups. Arms and legs and spleens and various other body parts went flying in all directions when our lines clashed.

Best combat round in the tournament (of any game played by anyone), hands down. There's nothing like two massive battlelines slamming home.
Melee, where Kevin's luck abandons him, but he manages to pass all his cohesion tests anyway.

Jammy Git.


Lower right, Perioikoi fleeing after—after—cutting down nearly half a unit of spearmen. Well done guys.

Not pictured: Spartans winning anything.


And splat go the scotsmen. Those two units on the left flank were the only points I managed to get off Kevin.


And here we have the set up against Rob's Vikings. Next time, Mr Wood, next time…
And a little picture of the battle in progress.

It was all going well until that unit in Rob's centre managed to make a CMT to turn, then flank charge the Spartans in the middle. Spartans who utterly failed to sweep before them the completely inferior Viking spearmen.

Also on the lower right, Thracians chewing through another unit. I begin to suspect this unit is special—after all, it's decimated 6 enemy BG's this tourney. And it's only Light Spear/Sword. And Average…


Last game set up, against Steve's Mittani. Lots of shooty chariots. All the terrain kind of vanished. It went bad from the get go, with me failing every cohesion test the entire game, bar two (once when the fragmented Phokians got charged, and once when the Thracians lost a combat).

Steve was a very gracious opponent, and his army looks amazing. Can't really say much else.


So the race for the coveted Wooden Spoon award was between me and Chris at the end of the day, but I wound up with it (dead last) due to Chris finally winning a game against Kevin's scotsmen in devastating style.

I can point out two reasons for that:
1) All these guys (except Chris) have played a lot more FoG than I ever have.
2) My dice rolls were, frankly, terrible, with the sole exception of the Thracians, and managing to kill Hannibal yesterday.

I claim a moral victory for being the only one to slay Hannibal. :P

Friday, 14 February 2014

A little bit smashed – Battlecry Day 1

So, Battlecry Day 1 was awesome. Despite me losing horribly. Twice. First up was Richard, with his Trojan War Greeks. Light Chariots,  Y U no stay and fight? Yeah, then he manoeuvres around and manages to rear charge some units. Bam. Done.

Game two was against Arthur's Lydian Greeks. Average start, not much in it. He gets a couple of points off my Thracians, and everything goes south when his dice fail to roll lower than a 4. Hmm… anyway, we both agreed that one was purely down to the dice. It really could have gone either way.

Game three was against Chris's Later Carthaginians. It went hilariously well. Starting with my Javelinmen charging his, then breaking them in a single turn. Then my Thracians messed up his cavalry. Chased his light horse off the board. Then got smashed by veteran African spearmen.

Then, the most crucial combat of the game, Chris commits Hannibal (Inspiring Commander 80 points, +2 to virtually every test known to man) to the front rank of a unit of Gallic Foot. All well and good, and the re-rolls helped them, until…

Yup, Hannibal's head now decorates my commander's tent. So half of Chris's army (it was blobbed up in refused flank) disrupts because of that. Next turn the Gallic Foot break, and some more tests, and everything that disrupted gets fragged. And that handed me the game.

I feel kinda bad for Chris, as he walked away from day 1 with no wins, and only managed to get a single point off my army.

Anyways, some pictures.
 The terrain vs Richard. Not too bad.
 Armies lined up. Painted armies, painted terrain. Just looks so much better. (insert Captain Obvious quote :P)
 Near the end. That's a unit of Spartans sandwiched between lots of chariots. Blargh.
 Terrain & armies set up vs Arthur. Not so bad. Except for all the terrain I'll have to slog through to get to him.
 And slog through it I did.
 I thought this was a portent of things to come. 7 hits off 8 dice. Unfortunately it was about my only good roll the whole game.
Lining up vs Chris on his awesome mat. Centre left, note the large blob of units. It's going to be important later.
 My javelinmen had successfully cut down his in close combat. Always funny seeing skirmishers fight.
 Remember that large blob being important?
Yeah, here's why. I killed Hannibal, the CinC of the army. This means everyone within 3" of the unit he was with has to take a test.

Three units in range. Two fail.
I break the central unit, provoking another flurry of tests. Look, more failures.

Yeah, I felt bad for Chris after seeing his army crumble like that, but when you blob up in refused flank, you either win, or everything suffers.